
| |
| Preserving our Natural Resources since 1997 | Your browser can't find the .css style script |
| Home | Equipment | Projects | Contacts | Links | About Us | |
 |
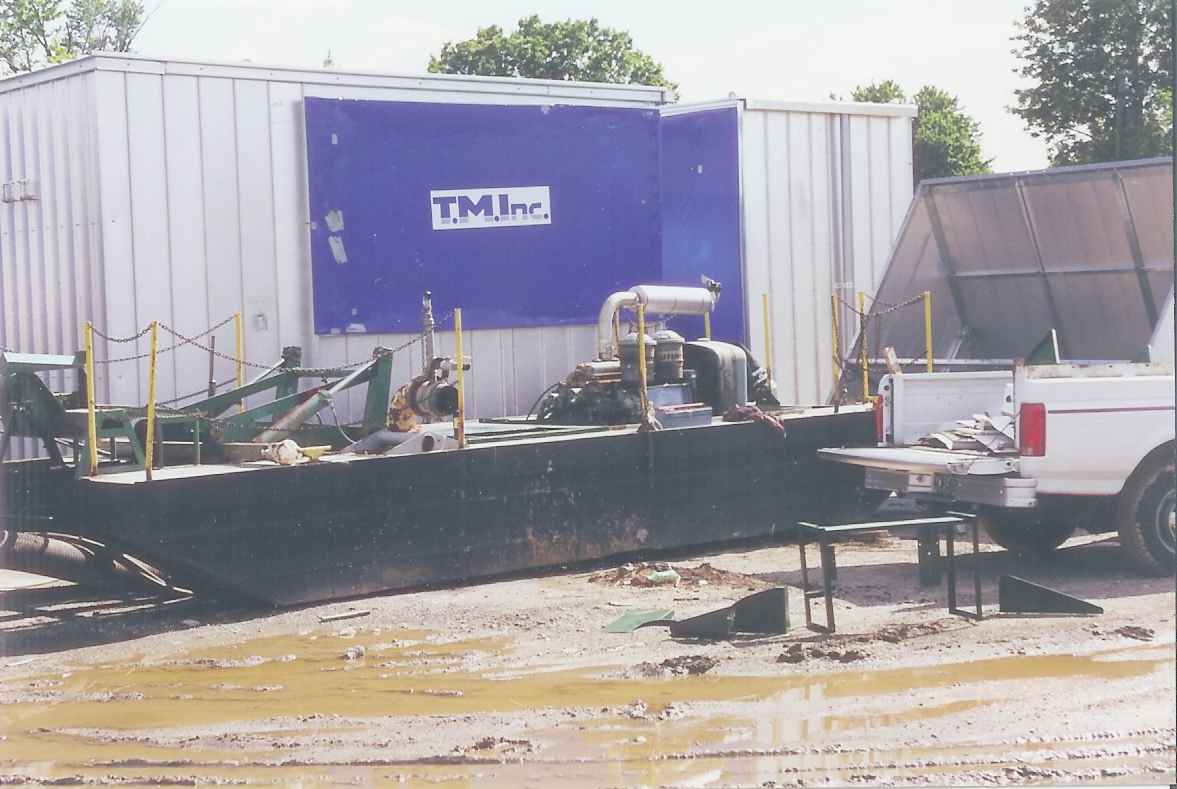
This is a shot of the old girl on the back of the flatbed truck.
She was delivered in January of 1999, It was a cold winter, so repairs went slow.
She stayed at the Laramie Crane storage yard in Detroit for the duration of the repairs. This is what a hydraulic dredge is used for |
|
Here she is getting rigged for the lift off the truck.
I think I'm gonna be sick, what did I buy! The hull was filled with ice, and it was in worse shape that I remember it. I pulled the drain plugs and waited for winter to break. |
 |
 |
On a Saturday in February of 99, we took a trip back down to the Ohio River Valley
to pickup the pipe that came with the dredge package deal.
How bad can it be to get some pipe, well 1,800 feet of pipe is a lot of pipe! |
| We carefully planned ahead for weight and size, the pipe was in 20 and 40 foot sticks, with coupling ends on some. We loaded all of the 20s with ends onto the 2 rented trailer, and chain sawed the 40s with good couplings next. |  |
 |
This trailers is half full of pipe with couplers.
We finished off each of the 2 trailers with blank 20 footers, and headed for home.
12 hours of travel time, and 3 hours of work made for a long day! |
| Sunday morning we restacked the pipe at a local storage yard until spring. Thanks for the help guys! |  |
 |
With spring of 1999 here, we removed the cab and engine cover so we could fix, sandblast and paint them. They where beat up pretty bad, and rusted too. While they were off, we found all kinds of things to repair. So the summer of '99' was all fix-up. |
|
June of 99, Another view of the bare hull, this sure seems like a lot of work!
We got a digital camera now the pictures will be better |
 |
 |
Here is a close-up of the pump housing (blue). We repaired the rock box on the right, the pump discharge is in the center, top. The rock box bottom was welded closed so we took that home and replaced the sliding door (in the bottom) and bought a new hydraulic cylinder that opens the door. |
| The mud shield was missing and what was left was welded solid, so we went home to build a new one. By looking at the photos in the service manual we came up with a working design. Here the frame work is fabricated and welded together. |  |
 |
We ordered the steel from Alro Steel, a
4' x 8' piece of 1/8" steel is HEAVY! We also ordered some 3" wide by 3/16"
thick flat plate, some pipe and rod for the pivot and some 1" square tubing
for the nose.
The ribs where cut from the 3/16" stock, the back is the pipe and the skin is 1/8" steel. All cut with a jig saw and welded in place in our driveway. |
|
With the skin on, we added some cutting
teeth to dig with. We cut those from the leftover 3/16" stock
We let the steel skin and frame parts run long, here we are starting to cut everything to length. |
 |
 |
A close-up of the teeth with the brace tacked
in place. The pivot pipe is in the back.
I love steel fabrication work! |
|
With the mud shield about done, we turned
our attention to the cutter head drive. We heard that thing often go bad
in there, so we pulled everything off and checked for bad stuff.
Everything looked great, so we cleaned everything up and aligned it all. |
 |
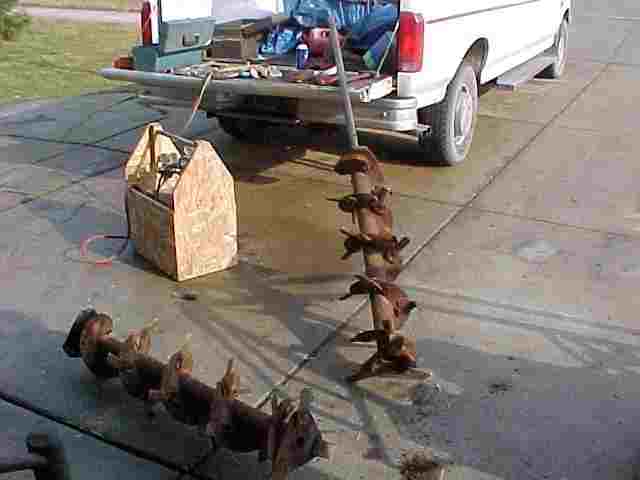 |
We removed the two auger sections from the cutter head.
All of the bolt heads where rounded off from running in the sand and muck.
We decided to torch off all of the bolts and replaced them, this would allow for easier field repair if necessary. |
|
When we finished the fabrication and after
a good coat of coal tar epoxy, we took the completed cutter head back to the dredge.
We had to build an overhead lift to move it from the trailer. The mud shield was installed next. |
 |
 |
Here is a picture of the mud shield in place,
there are 2 hydraulic cylinders, not shown, that operate the shield.
It can be used to excavate material that is above the water surface, knocking it into the auger and then into mouth of the pump for removal. |
| A finished shot of the mud shield we made. |  |
 |
This is a bellcrank that raises and lowers
the cutter head. We found that it had been poorly repaired several
times and the welds where starting to crack again.
We cut it apart and straightened all of the parts, cleaned and welded all of the cracks, and reassembled it, adding gussets to prevent cracks again. We added new steel for the cylinder pivots, as these where all egged out of round. |
|
The dredge stayed at Laramie through the
winter of '99' we worked off and on, but work went slow.
So in the spring of 2000 we had to get moving! Here while the bellcrank was off, we cleaned, primed and painted the bellcrank mounts. |
 |
 |
The finished bell crank with the lift cylinders in place . |
|
A back view of the hydraulic controls panel,
this has all of the controls and hoses for the hydraulic system.
The green base was ruined, so we made a new one from scrap steel angle.
We replaced all of the external control hoses to reduce field failures that might dump hydraulic oil in the lake. |
 |
 |
A front view of the gauge panel. Most of the gauges needed to be disassembled and cleaned. A few gauges where missing, so we replaced them as well as the inline gauge protectors. |
|
This is a picture of the front of the dredge,
looking into the inlet of the pump. We got the cab and engine cover
back on.
Most of the front workings like the rockbox, cutterhead, traverse drive and bellcrank are removed here. |
 |
 |
While we had everything striped off for repair, we decided to pretty her up. We had to wait for a warm spring day to start. |
| With a break in the weather, we power washed, wire brushed, and sanded until we got down to the clean metal. Then a good coat of Rust-oleom primer to start with |  |
 |
As the good weather continued, the next day we added a good coat of Mudcat green to the front end. |
|
A finished drive unit. The drive motor gearbox (behind the yellow pipe)
was rebuilt, new gears and bearing, We
made the three new pulleys, and the chain coupler was replaced.
This front assembly is used to provide the cutting force by pulling the dredge forward with a 5/16" cable stretched across the lake. |
 |
 |
The back cable guide, used to keep the tail
in line with the 5/16" cable, was bent, and put on backwards?
So we made a new one out of 1/8" plate patterned from the service manual. Here is the first fitting to see if we got our dimensions correct. |
| And the finished guide, with the cable followers installed. We had to make new rollers and repair what was left of the cable follower. |  |
 |
We found that most of the safety chain post
where filled with mud and water, so they rusted away at the bottom,
We made new ones from pipe, we capped the tops and bottoms also we added brackets for safety chains, these are stacked to either side of the support |
|
With summer approaching and the dredge about ready, we had her loaded onto the 4 axle
trailer we built from an old mobile home frame.
That's an interesting story also. |
 |
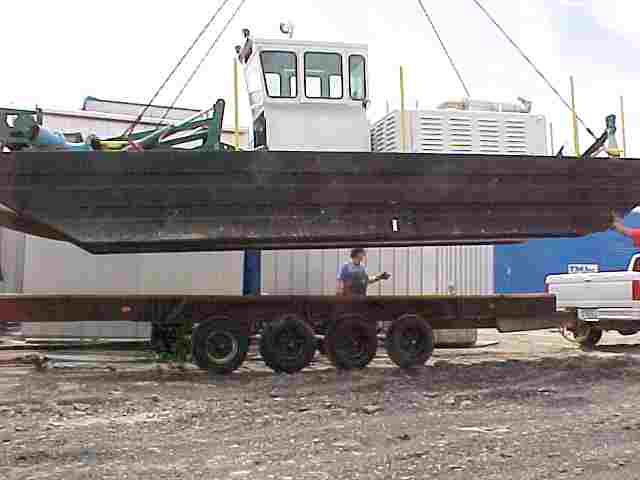 |
That's my truck attached to the trailer,
the crane scale said the Mudcat weighs 15,000 pounds.
We knew it was too much for my truck, so we rented a dump truck to haul it up north. |
|
Early on Friday we left to haul her up north,
due to the weight of the trailer, and the setup we could only go about
45 MPH, that took all day. What a scary ride!
That afternoon when we got to the pond,
we unhooked the trailer near the shore and turned right around and drove
the dump truck home.
Early Saturday, we got in my truck and drove back so we could launch her. |
 |
 |
Another project, we needed a way to back
a 7 ton dredge into a lake with a sandy shore.
So we built a hitch for the dozer. We used the attachment points for the root rake to support the hitch, we could use the lift cylinders to adjust the angle of the trailer for launching the dredge. |
| We attached the trailer to the dozer, and carefully backed her up to the shore of the pond. |  |
 |
When we got close enough, we removed the
tie down chains, greased the top of the trailer to make it slide, and gently
winched her into the water just as planned.
What a sight! after 18 months of work it all came together, we are finally in the water. Now the fun starts! |
|
That's it! June 17th of 2000, after 18 months
of work and planning, we're in the water, and she floats!
Now it was time to dredge a little. follow the story here! |
 |
| back to the top
This is the story about our hydraulic dredge. It's called a hydraulic dredge because it uses hydraulic principles to move material. It mixes the dredge material with water, and pumps the mix through a pipe to shore to de-water. We ended up with buying a used hydraulic dredge. New machines, starting at $150,000, were out of the question. We looked to rent or lease a machine, still way too expensive. So our only option was to buy our own, and fix her up a bit. As it turned out it would be quite a fix up job! One day in the summer of 1998, Carol saw a dredge at a lake near the house. We jumped in the car to check it out! It was a new cutter head dredge from IMS, so I contacted them about used dredges. I told them my situation, very little money and a lake full of mud. Mike from IMS laughed, and said he would "look around" for us, but I didn't have much hope. The Great Lakes levels where failing, and every dredge that came up for sale was either snapped up, or way too expensive About a month later I got a call from IMS, they have an old Mudcat they are taking in on trade, it was in poor shape and reasonably priced. It also came with some discharge hose and assorted rigging hardware, Hmm interesting! In the fall of 1998,we started working on a deal for the used Mudcat MC-10. Our research found that the Mudcats really started the cutter head dredge industry. During the search, we found Dale Degalman is the son of the guy that invented the Mudcats. We wanted to find out if the MC-10 would work for us. He confirmed it was designed for just that purpose. Check out his web site for the Mudcat history! Carol and I drove down to the Ohio River Valley to see this "Mudcat" thing in person. It was in bad shape alright, the wiring was a disaster, it was rusty and dirty, but it ran strong. By the end of December it was ours! Our Mudcat arrived on a snowy, sloppy day in January of 1999. The hull had about 8 inches of frozen mud in the bottom, but the pumps had anti-freeze in them, so we waited until spring to start any repairs. We had to make a run back down to the Ohio boatyard to get the 1,800 feet of 8 inch discharge pipe, that was an 18 hour day! In the spring of 1999, I started the rebuild. I figured it would be pretty easy, just fix the wires a and clean her up a bit. We found the dredge pump and the engine were is great shape, but most other systems had to be fixed to keep the running maintenance down. We removed anything we could, and straightened and painted almost everything! There was plenty of parts and even whole sections that needed to be fabricated. It was fun, but I glad it's over. |
|